Cooking videos in here

Cooking videos in here
Click the pic to go on my YouTube Channel
Showing posts with label how to ?. Show all posts

Thursday, 20 November 2014

Tasty Quinoa Salad | I Love Quinoa

Here is my favorite quinoa salad tossed in a light salad dressing. 
Serve grilled chicken or fish with this salad and you have an excellent lunch or dinner dish ready.

For dinner I served this salad with some creamy corn and chicken soup with toasted buttery bread.  
Really quick and so yummy.

This salad dressing is so versatile that I drizzle it over grilled veggies, pasta and even fish, a very basic and handy dressing to keep in your fridge. 
You can also store the left over dressing in the refrigerator for up-to a week, just make sure you keep it in an airtight glass jar.

We all know quinoa is a super food and its wonderful benefits so I feel anything this healthy must not be overly seasoned and topped with condaments which overpowers the actual flavor of the quinoa. 
I never enjoy the food if i do not taste the star ingredient. 

Quinoa is supposed to taste nutty with a little bit of a crunch so do not overcook it. Ever.


This post will also show you how to make perfect fully quinoa.

Ingredients for Cooking Quinoa 
1 cup quinoa ( store the left overs for later)
2 tsp olive oil
2 garlic pods grated
1 tsp salt

For the Dressing
1 garlic minced fine
1/4 cup olive oil
2 tsp sugar
1 tsp pepper
2 tsp vinegar

Assorted salad leaves

Start by adding olive oil to a pan, add the washed and drained quinoa sauté for 2/3 min till you get a nutty aroma, add in the garlic and sauté for another 2 min. 
Adding the garlic after the quinoa is sautéed helps the garlic not get over cooked and burn.

For every one cup quinoa you need two cups water or stock, for this salad i used water.
Once you smell the garlic add 2 cups of water, salt and wait for a boil, once you see the water boiling turn down the flame to low and cook covered for 10/15 min.


Open the lid after a 5 min stand time. This step helps you get perfectly cooked quinoa every time.

                                     
Allow the quinoa to cool while you make the dressing.

For the dressing mix all the ingredients listed with a small whisk, make sure you taste the dressing and adjust the taste before you add it to the salad.


Now all you do is add the quinoa to the salad leaves and toss, pour the dressing and toss well making sure the dressing is well coated.
                           
Serve right away with toasted buttered bread, grilled chicken or fish and soup.


You may add olives, tomatoes, onions and so many of your favorite ingrediants to this salad but I wanted to keep it simple as I was serving it with a creamy soup.

Do try this recipe and I hope you like it.

Thursday, 19 June 2014

How to Make Tasty Chicken Stir Fry with Veggies

Stir frying chicken with veggies is really easy, it always makes a quick meal full of goodness. 
Adding spices and sauces are of-course to your liking but some how in my eyes, a great chicken and veggie stir fry is with just a few ingredient's and nothing more than two sauces. 

This dish has to highlight the veggies and chicken so adding too many sauces can over power the dish.
My fav combo is soy and oyster sauce, a true match every time. 
Here's my go to stir fry which i have at least once a week.
After trying many variations this one is my favourite and over the years I have now learnt on getting the best out of this humble mix veg and chicken dish by cooking it just right, in my eyes of course !
Just saying !!!!
 
Serves two

I use only these veggies and nothing more

1 Carrot cut in squares
1 Green capsicum cut in squares
5/7 large mushrooms cut
1 cup snow peas
1 small zucchini cut in squares
1 large chicken breast cut in strips, marinate with a pinch of sugar, salt and chilli sauce.
Marinate for half an hour.

2 tbs soy sauce
2 tbs oyster sauce
1/2 cup water
1 tsp vinegar
1 tsp chicken stock powder
1 tsp sugar
2 tsp freshly cracked pepper
salt to taste

1 tbs garlic minced
1 tbs ginger grated
Spring onions for garnish

Not adding even one ingredient makes a world of a difference, i highly recommend you guys stick to the listed ingredients for best results.

Before you start cooking make a sauce mix, add the water both the sauces, pinch of salt,chicken powder, sugar and the corn flour. Mix well and keep aside for later.

~ In a pan boil some water and add salt along with the vinegar,add in the chopped carrots and boil for 5/7 min, you may boil them a little longer if you want them a bit more cooked but its best to keep a bit of a crunch.Once the carrots are boiled drain and transfer to a plate.

~ In the same boiling water add in the snow peas and zucchini, boil for just 2 min, drain and transfer to a plate.

~ Last add in the capsicum and boil just for a min, drain and keep aside too.

~ Now its time to stir fry, use a large pan for this. Add some veg oil and saute the marinated chicken, let the chicken cook, almost 90 % done. Add in the ginger and garlic at this stage, adding it before will burn the garlic so add it only once the chicken is half cooked.

~ Next add in the mushrooms and cook for 2/3 min tossing with the chicken.

~ Transfer all the veggies to the pan and toss well, add in the sauce mix and allow to coat all the veggies and chicken. Toss well till the sauce thickens, now add in the crushed pepper.

Once done, garnish with spring onions.

You can have this with steamed rice or even just as a side dish or even as a main meal its yum any time, hope you guys try it out.

Friday, 1 March 2013

Idli Podi Recipe (spicy gunpowder) | Idli/Dosa Spice Powder

Here is a spicy idli podi recipe.
 
15 whole red chilis
1 tbs hing
1 tbs whole coriander seeds
1/2 cup urad dal
15 curry leaf
1/2 tsp mustard seeds
 
Start by adding 1 small tsp oil to a pan,allow to heat and add mustard seeds.
 
Next add the urad dal and saute till light brown,add the curry leaves too.
 
Remove the ingredients and keep aside,in the same pan add some more oil.
 
Saute the dry red chili,hing and whole coriander seeds till aromatic and light brown.
 
Now allow to cool and mix all the ingredients well.
 
Grind coarse or to a fine powder and store in an airtight container.
 
Serve the powder mixed with ghee and eat with dosa or idlis.

Wednesday, 24 October 2012

Instant Mango Pickle (Aam Ka Achaar) | Easy Homemade Instant Mango Pickle

As a South Indian having Instant Homemade Mango Pickle with yogurt and rice is cocoon food for me.
I always feel cosy and happy instantly after a few bites of this.Such a classic combination.

I have tried this pickle a few times with other spices and temperings,and found that this recipe tastes the best.And what i like is it gets ready in no time,the only thing that takes time is the marination.

Do try it some day ! It is good,really good.
As it is just me and hubby at home,i make a very small batch of this.I hate keeping things in the fridge for too long,but you may double the recipe for a bigger batch.

Here is the Easy Instant Mango Pickle Recipe.

Marination
2 medium size raw mango
2 tsp salt
1 tsp red chili powder

Tempering
1 tsp turmeric
1/2 tsp crushed red chili
1 tsp mustard seeds
few fenugeek seeds
1 heaped tsp hing
5/8 curry leaf

You also need a clean glass jar or bowl,microwave for 1 min after washing it.It must be free of any water.
After washing the mango,dry it with a towel and then cut it in small pieces.

Mix well with salt and red chili powder,best if you use gloves or just a plastic wrap wrapped to your hands for mixing.
Pickles have longer shelf life if they are untouched by hands.I like to think that,but it depends on how you want to do it.
Keep it covered near a sunny spot for 4/6 hours.If you do not have a sunny spot,just keep it on your kitchen counter for a few hours.It will still taste great.

After letting it sit for a few hours,drain the liquid and get ready for tempering.

Add 2/3 tsp veg oil and temper with mustard seeds,hing,curry leaf and the fenugreek seeds.
Then quickly add the turmeric and crushed red chili,make sure to not burn them,add the mango now.

Toss for 2/3 min and now your done.If you feel you need more salt,feel free to add some.

And now you can serve your very own Tasty Home made Instant Mango Pickle (Achaar)


Friday, 7 September 2012

How to Make a Piping Bag at Home | Making a Piping Bag at Home

You don't have a piping bag? Don't worry, you can make one at home any time.Just keep reading.

For making a Homemade Piping Bag you need these -
  1. zip bag
  2. scissor
  3. icing
  4. cup or glass

You can make thin or thick lines with this home made icing bag.


                                       Open the zip bag and place the pointed corner into a glass.
                                       Fill the icing of your choice into it.

                                       Push the entire icing firmly so it reaches the corner tip.
                                       Cut the corner tip when you are ready to pipe your cake.
Now your done !
Happy icing and decorating !! XOXOXo

Saturday, 18 August 2012

Classic Pizza Sauce | Pizza Topping Ideas | Versitile Pizza Sauce

Have you ever thought about '
How to make Delicious pizza toppings at home?
How to make basic pizza sauce from scratch?
How to top your pizza's?
How to make no cook pizza like a pro?
How to make basic Italian Pasta and Pizza Sauce?
Don't worry I got the answer to all your questions.So read on.
Oh and there is also a WARNING,check it out.


 WARNING :
Keep one thing in your mind,this post can change your life as after reading the recipe and storing procedure you will make pizza and pasta more often.So in case you gain weight please do not hate on me.
I did warn you.The choice is yours,do you want to continue reading??


I have no idea how many times i must have made this basic pizza sauce.It is my go to sauce and i always keep this handy.Best part is you can dilute it and cook it as a soup too,then finish with some cream.So versatile and easy!

My baby sister would ask me to cook pasta at any odd hour and i would be more than happy as i always had this ready stored in my freezer.After all these years i still stick to this recipe,it is the best i tell you.

Here is the recipe for the best Versatile Pizza Sauce also called Basic Italian Pizza Sauce.
A must in your freezer so you are ready for pizza any time.


Second recipe is my No Cook Pizza Sauce
This no cook pizza sauce is equally delicious and for days when you have no Italian Pizza Sauce left.

You need
1 cup Tomato Puree
3tsp garlic powder
2 tsp onion power
3 tsp sugar
1 or 2 tsp salt
2 tsp oregano
2 tsp Mix Italian seasoning
1 tsp crushed black pepper
All you do is mix everything together and keep aside for 15 min so everything mixes well before spreading over the pizza base.


ready to bake

Few Pizza Toppings Ideas
I mostly make two toppings one is a bell pepper mix and the other will be a mushroom and chicken mix for the base.We then add other toppings on top to our liking.

You can get creative and top your pizza with any veg or meat of your choice.
My hubby's and my favourite combinations are
Bell Pepper Pizza
Cheese and Olive Pizza
Pineapple and Chicken Pizza
Mushroom and Chicken Pizza.
Classic Tomato and Basil Pizza

Friday, 3 August 2012

How to make Mughlai/Shahi Gravy Paste | Rich Indian Gravy Paste

Making Gravy Pastes for Storing is a wonderful and easy way to cook any kind of rich dish if you are in a hurry.The creamy white gravy paste is used for shahi veg dishes,mostly for malai koftas and also for white meat based gravys.
The Brown Gravy Paste is used in most Punjabi and Mughlai gravy dishes.

Once you have these pastes ready and stored, life is so much easier in the kitchen and you are always ready to dish up something special for your family.


For the Shahi (white gravy) paste-
garlic 4
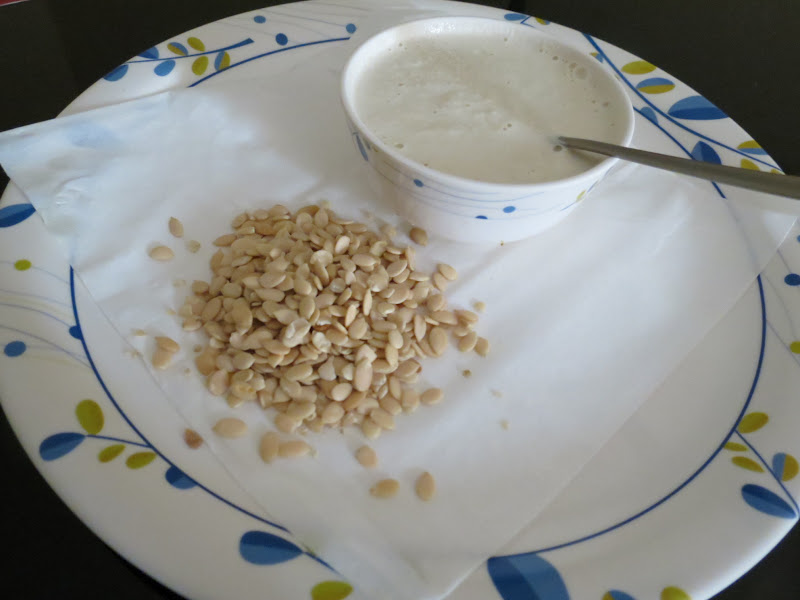
almonds 4(soaked then peeled )
cashews 4 (soaked 1 hour)
cardamom 2 pods
melon seeds 4 tsp(soaked 1 hour)
bay leaf 1
boiled onion 2
Grind all these ingrediants adding cold milk,add little milk at a time as the paste must be thick.
Store this in ice trays and use when ever you need some white gravy.

For the brown gravy
Fry onions till brown and drain well on napkins,then follow the same method for white gravy and then add the brown onions,grind all this till smooth.Your brown gravy is now ready.
Happy cooking you all.
i always write the date when i store things,you must too


Check out my way of storing Onion tomato gravy.


Wednesday, 6 June 2012

Radish and Carrot Instant Pickle | How to make Instant Carrot Pickle?

This carrot & radish pickle can be made in 5 min and then in about 5 hours minimum its ready to be eaten,this is if your really impatient..Now in case you can resist not opening the bottle for 1 whole day then great,the flavours will get mingled perfectly and your gona have mouth watering pickle...This can be kept for upto 5 days in the fridge.

Sweet Sour and Salty Carrot and Radish Pickle | Radish and Carrot Instant Pickle

its ready woo hoo
Sweet Salty and Spicy...
   Lets start making Radish and Carrot Pickle


cut radish and carrots- the thinner the better
finely chop ginger and garlic
green chili to taste
red chili pwd to taste
in a cup mix vinegar - sugar - salt
  and mustard powder about 1 tsp..


mix everything together for 5 min and store in a glass jar..
make sure the jar is dry and sterilised

now your done !!
 

all mixed in


Saturday, 10 March 2012

How to make an Energy Power Drink? | Mango Yogurt Smoothie | Special Dry Fruit Smoothie

This is my Special Mango Lassi with pistachio and tutti fruity, it  tastes more like a dessert in a glass,and is thick and creamy...So serve this on special days and impress your guests...I mostly drink this sitting with Biju lazing on my couch,my Fav special time with my special boy...

Check out my Recipe by clicking the link !
Mango Dry Fruit Smoothie video


i always love toppings on my lassi
 
mmmmmmmm

Tuesday, 11 October 2011

Easy Homemade Khoya/Mawa Recipe | Steps to make khoya at home

Diwali is around the corner and its time to make sweets, as you all know most of our Indian sweets need Khoya to add to the richness,and i feel its best to make it at home.

Trust me it tastes better too..In just 10 min your homemade khoya is ready.
Please try it.You will be glad.
 
To make homemade khoya in easy steps keep reading.

There are 3 types of Khoya
1.Grainy Khoya
2.Smooth Khoya
3.Wet Khoya

I will show you 3 ways you can make khoya/mawa very easily in your own kitchen.
It is really simple and you will never bother getting Khoya from the store again.

Check out my recipe below !
 
1. For Grainy Khoya / Mawa Recipe ( No Cook Khoya)

Mix 1 cup full cream milk powder and 1/2 cup warm milk with a spoon of butter till it forms a paste,not too runny,then strain through a fine sieve.Make sure you add the milk little at a time.
This is the easiest way to get Grainy or Crumbly Khoya / Mawa

Grainy Khoya / Mawa is used for Gujia / Paratha / Gravy Dishes /Rich Koftas / Cakes and Sweets

2. Microwave Khoya / Mawa - Wet Khoya (easy microwave khoya recipe)
Mix 1 cup milk powder and 1/2 cup thick cream in a microwave safe bowl.Mix it till well combined.
It must look like cake batter.
Microwave the mix for 1 min,remove and mix again.Once again microwave for 2 min.It is ready now !
Once it is cool it will get thick and ready to use.
Microwave Khoya / Mawa is an easy way to make a milk dessert called Barfi in no time.

3. For Smooth Creamy Khoya (Homemade Khoya made in a pan)
step by step recipe below

this is how the smooth khoya looks like


all you need is
1/4 cup cream
1/2 cup milk powder

add the cream in a pan then mix in the milk pwd

stir till everything is combined and no lumps are formed
it gets thick in a few min


cook7/10 min..and remove from flame
it gets thick once cooled....

Sunday, 9 October 2011

Homemade Curry Leaf Powder | Healthy Curry Leaf Powder

Most of you know the wonderful benefits of curry leaf,for those who dont, please do google it...in short its great for your system !
These powders are really tasty and can be strored for a month in the fridge...They can be eaten with idlis,dosas,rice and can also be added in gravys and dry side dishes !

There are 2 ways to make Curry Leaf Powder...one with spices and 1 with just cumin....
lets start with version 1

goes best with steamed rice and ghee

for 2 cups curry leaf
1 red dried chili
pepper corns 1/2tsp
1 tsp chana daal
3/4 garlic pods
1/2 tsp tamrind paste


tempering spices
cumin 1tsp
hing 1/2 tsp
less than a tsp fenugreek seeds
1 tsp mustard seeds

in a bit of oil saute all the spices and the garlic

after the spices are sauted for 5/7 min,remove it and in the same pan toast the curry leaf till crispy

after the curry leaf gets a crispy texture set aside with the spices to cool
add a pinch of salt too

after its cool,grind to a fine or coarse powder and store in a glass jar
keep refrigerated ..
                                       now lets see how to make version2
the second way to make this powder is to saute curry leaf and cumn powder and dry roast it 


then grind and store in a glass jar....best to keep it in the refrigerator


Tuesday, 13 September 2011

Homemade Pure Desi Ghee Recipe | Desi Ghee Step by Step Recipe

Finally i got myself to make ghee,i thought only my mama could do it,stupid me right ! I used butter,you may use cream if you wish...with a little patience you can make pure ghee in your very own kitchen....
I totally feel in love with the golden colour,and it tasted amazing ! give it shot if you havent,its so worth it !

Homemade Ghee Recipe | Making Clarified Butter at Home
my first time at making ghee

beautiful colour before it gets thick.

i used 400 gms unsalted butter

let the butter melt,and allow to cook for 15 min

keep a very slow flame

after 15 to 20 min  butter on top becomes transparent

ooo its gona be ready any time,you see the brown particles on the sides?
that means it ready ..turn off heat and DO NOT COOK FURTHER

all the brown particles which is milk solids settle down
strain into a glass jar when hot,it gets solid in no time !
do not cover for 1-2 hrs


and your done..
my first try, so i made just half a jar


all ready to use !

Related Posts Plugin for WordPress, Blogger...